Combining Craft Techniques (Part II)
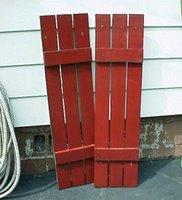
 Another craft project I accomplished by accepting a set of wood shutters that a friend of mine had removed from her house. Why she didn't just reuse them instead of buying the new vinyl ones....is beyond me. They were still in good shape....solid, no rot....and WOOD. She was putting them in the trash until I happen to stop by and decided to take them home. This was a set of six shutters and I just knew I could do something with them!
What made it nice, is that they already had a "base coat" of paint on them! They only needed to be washed down to get the spider nests off of them (yech!!!). Once that was done, and they were dry....it was time to let the imagination flow.
 Here's the completed craft project....what a cute screen/room divider...don't ya think?
I first painted them a sage green (latex paint) and didn't like the plain color so proceeded to do a light wash (remember....that's with watered down paint) over top of it with cream colored paint. Then I proceeded to mask off the center area of the the two center shutters and did two more coats of the wash just in that area.
I really had no idea what image I was going to use in the center, so I just went through what stencils I had (mainly bought at yard sales) to see which one grabbed me. I used the whole stencil in the middle of the center two shutters....and just picked out parts of it to stencil in the center of the outer shutters as well as the upper corners of the two center ones.
Now I still have two shutters left that will probably be made into a corner shelf unit. The cross boards on them will make it really simple to add two triangular pieces of wood for shelves....painted mainly white and sanded for a shabby chic look, and I'll be all set! Or, perhaps, I'll use the same paint as this project and have two complimenting pieces!
You'll find as you're wandering into the craft world that you may not like the end result of something you done, but the good part is, most of the time by just adding another step/process, you'll be really pleased and proud of the end result.
Just as in this craft project, where I combined four different techniques to accomplish the end result, which I wll address another time.

0 Comments:
Post a Comment
<< Home