Father's Day Crafting
We all know how hard it is to find something unique, special, and usable for those special male species that are in our lives.
One of the simplest projects I have found to make for this occasion, especially that the young kids can do in less than a 30 mins.....without a huge mess that takes you an hour to clean up....is a magnetic cd case address book that will house his important phone numbers that he needs close by (on the refrigerator, of course).
This is something that is usable, inexpensive (you only need to buy magnetic tape), and can look great if you theme it with the rest of your decor. I expanded on an idea I saw elsewhere on what to do with those free CDs you get all the time in the mail......and usually throw away.
Here's the instructions:
Supplies:
CD case (free)
Images (free/included)
Roll of magnetic tape ($2-$3) (the magnetic "sheet" is not thick enough....been there/done that!)
Take an empty cd case.....you know any of those you get in the mail from AOL, etc., will work great. Or the next time you're in a department store (Walmart, Kmart), look for the free ones they give away.
Take out the cd and keep it for another project....or pitch it! Take out the front insert also, as well as the piece that holds the cd in place. It just snaps out. If this is one of the new "thin" cd holders, you won't be able to do this step and will have to adjust your image that's going to go on this side*.
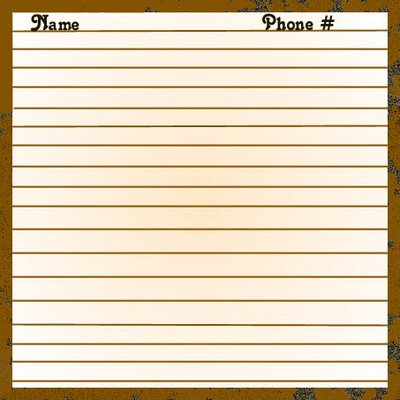
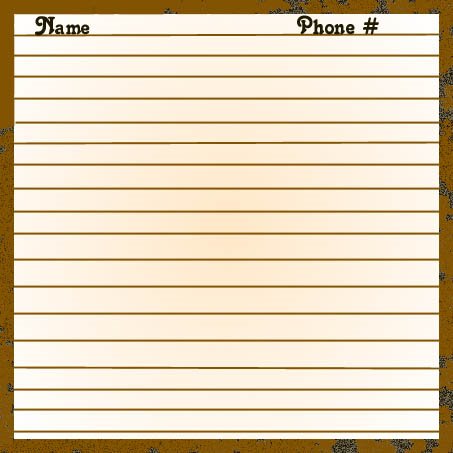
Cut out the images that came with these instructions. You'll have one front image and three images where names and phone numbers can be written in. It's best to try and print these off on card stock if possible.
After cutting them out, take the front image and one of the name/phone number images and using a glue stick, glue them together....back to back. Insert this one in the front space of the cd cover with the picture image facing out. (I have also used the glue stick in the corners of the front image to hold it in place in the cd cover so that it doesn't keep sliding around.)
Take the two name/phone number images that are left and glue them together, back to back. You will only be able to lay this in the back cover. If you don't want this moving around in the case (nothing is holding it in) you will need to either wait for the names and phone numbers to be written in......or just eliminate one of the images and just glue one down aligning it with the outside edge of the cover.
Once your images are in place, take your magnetic tape and cut off four pieces of equal size, approx. 3/4". Place one piece in each corner of the paper that shows through on the back (if you just place in the corners of the cd, the magnet will show through to the front of the cd). You can now place this on any metal object (refrigerator) and you have instant handy access to the phone numbers you need!
*For the thin cd cases.....you will need to cut a hole in the middle of two of the name/phone numbers images to fit over the cd holder. Use the cd holder as a guide for where the hole needs to be cut.
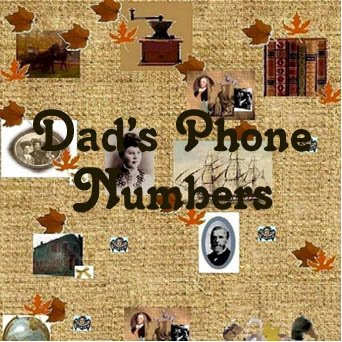
You can use any image for the front cover (I've included the ones I've used below...just right click and "Save as" to save a copy to your computer)....just cut out a child's picture, or have them make their own image....size should be 4 3/4" x 4 3/4". Sure to be cherished!
Make 3 of these.
I hope you have fun with this very inexpensive project.....I know my grandkids did!
One of the simplest projects I have found to make for this occasion, especially that the young kids can do in less than a 30 mins.....without a huge mess that takes you an hour to clean up....is a magnetic cd case address book that will house his important phone numbers that he needs close by (on the refrigerator, of course).
This is something that is usable, inexpensive (you only need to buy magnetic tape), and can look great if you theme it with the rest of your decor. I expanded on an idea I saw elsewhere on what to do with those free CDs you get all the time in the mail......and usually throw away.
Here's the instructions:
Supplies:
CD case (free)
Images (free/included)
Roll of magnetic tape ($2-$3) (the magnetic "sheet" is not thick enough....been there/done that!)
Take an empty cd case.....you know any of those you get in the mail from AOL, etc., will work great. Or the next time you're in a department store (Walmart, Kmart), look for the free ones they give away.
Take out the cd and keep it for another project....or pitch it! Take out the front insert also, as well as the piece that holds the cd in place. It just snaps out. If this is one of the new "thin" cd holders, you won't be able to do this step and will have to adjust your image that's going to go on this side*.
Cut out the images that came with these instructions. You'll have one front image and three images where names and phone numbers can be written in. It's best to try and print these off on card stock if possible.
After cutting them out, take the front image and one of the name/phone number images and using a glue stick, glue them together....back to back. Insert this one in the front space of the cd cover with the picture image facing out. (I have also used the glue stick in the corners of the front image to hold it in place in the cd cover so that it doesn't keep sliding around.)
Take the two name/phone number images that are left and glue them together, back to back. You will only be able to lay this in the back cover. If you don't want this moving around in the case (nothing is holding it in) you will need to either wait for the names and phone numbers to be written in......or just eliminate one of the images and just glue one down aligning it with the outside edge of the cover.
Once your images are in place, take your magnetic tape and cut off four pieces of equal size, approx. 3/4". Place one piece in each corner of the paper that shows through on the back (if you just place in the corners of the cd, the magnet will show through to the front of the cd). You can now place this on any metal object (refrigerator) and you have instant handy access to the phone numbers you need!
*For the thin cd cases.....you will need to cut a hole in the middle of two of the name/phone numbers images to fit over the cd holder. Use the cd holder as a guide for where the hole needs to be cut.
You can use any image for the front cover (I've included the ones I've used below...just right click and "Save as" to save a copy to your computer)....just cut out a child's picture, or have them make their own image....size should be 4 3/4" x 4 3/4". Sure to be cherished!

Make 3 of these.
posted by J. Martin @ Wednesday, May 24, 2006
1 comments
![]()
![]()